Disclosure: This post may contain affiliate links, meaning we get a commission if you decide to make a purchase through our links, at no cost to you. See our full disclosure here.

My first two blueberry plants died because I refused to test the soil. I told myself I knew what I was doing — I’d grown tomatoes, I’d grown peppers, how different could it be? Different. The answer is different, and we’re going to fix that for you before it costs you a plant.
The Quick Answer
Blueberries need acidic soil — a blueberry soil pH between 4.5 and 5.5 — and the only way to know yours is to test it. You can use a paper test strip kit (cheap, a little fiddly) or a digital soil meter (faster, easier, what we recommend). If your number comes back too high, you lower it slowly with elemental sulfur or a soil acidifier. Patience is the whole game.
Why Blueberries Are So Picky About pH (Spoiler: They’re Not — They’re Just From Somewhere Specific)
Here’s the part nobody told me when I bought my first plants: blueberries didn’t choose to be high-maintenance. They evolved in pine forests where the soil is naturally acidic, and their root systems just never built the equipment most plants have for pulling nutrients out of neutral or alkaline soil. So when we plant them in the average backyard — which usually runs somewhere between 6.5 and 7.5 on the pH scale — they’re not failing. They’re starving in a buffet line they can’t reach.
That’s the whole problem in one sentence. The soil might have plenty of iron and nitrogen sitting in it, but if the pH is wrong, the blueberry roots can’t unlock any of it. Yellow leaves, stunted growth, that slow sad decline — that’s a hungry plant, not a sick one.
Once you know that, the whole project gets less scary. We’re not trying to perform chemistry. We’re just trying to set the table the way they recognize it.
Test Your Zone Before You Test Your Soil
Before you spend a dime on a test kit, do me a favor and grab our free growing zone report. Drop your zip code in and we’ll send back your actual zone for your actual address — not the regional sticker on a plant tag at the big box store. Your zone determines which blueberry varieties will actually thrive where you live, and there’s no point fixing your pH for a variety that was never going to make it through your winters.
It’s free, it’s ungated, and it’ll save you from buying the wrong plant. That’s our gift to you, no strings attached.
How to Test Blueberry Soil pH
You have two ways to do this. Both work. One is cheaper and slightly fussier; the other is faster and a little more forgiving. Let’s walk through both so you can pick which one fits how you actually want to spend a Saturday morning.
Method 1: Paper Test Strips
A test strip kit is the budget-friendly option, and honestly the first time I ever tested soil it was with one of these. They run about ten to fifteen dollars and come with everything you need — strips, a little vial, a color chart on the back of the box.
Here’s how it goes:
- Dig a small hole about four to six inches deep where you plan to plant (or where your blueberries already live). Skip the top inch — that’s leaf litter and not what your roots are actually swimming in.
- Pull a tablespoon or two of soil from the bottom of the hole and drop it into the vial.
- Add distilled water — not tap, because tap water has its own pH and will throw your number off. The kit will tell you how much.
- Cap it, shake it, let it settle for the time the kit specifies. Usually a minute or two.
- Dip the strip into the slurry. The strip will change color.
- Match the color to the chart on the box. That’s your number.
That’s the whole thing. The first time I did it I was sure I was going to mess it up somehow. I did not. You will not either.
The honest downside: paper strips give you a range, not a number. You’ll know if you’re at “around 6” or “around 7,” but you won’t know if you’re at 6.2 or 6.4. For most beginners that’s plenty of information. For anyone who wants to stop guessing, the meter is worth the upgrade.
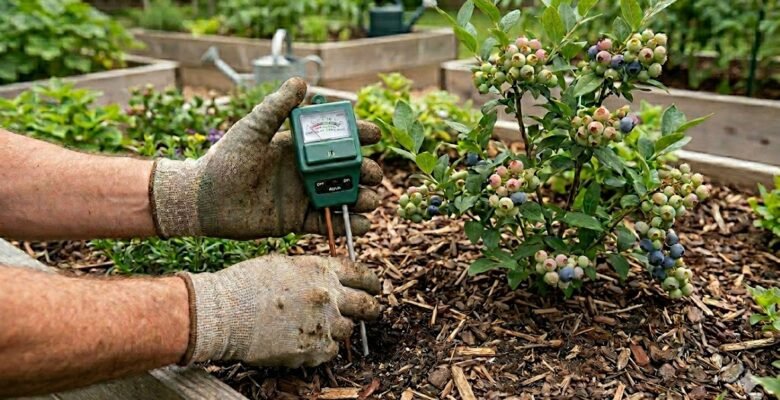
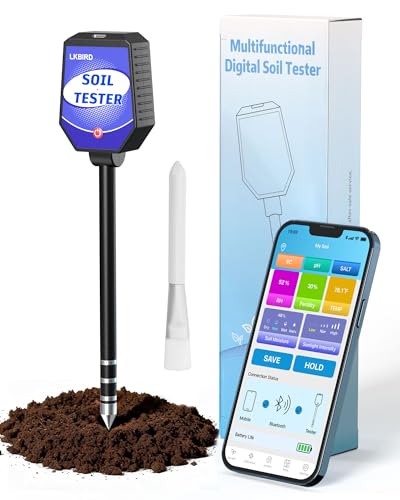
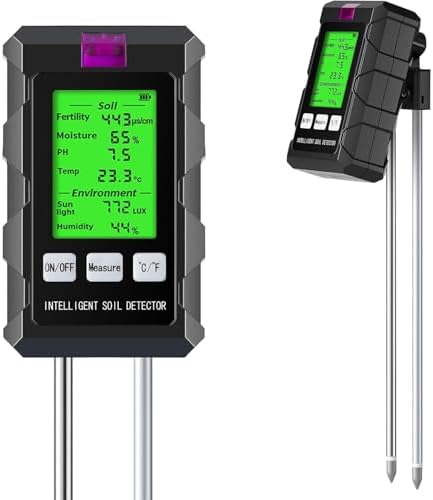
Method 2: A Digital Soil Meter (What We Actually Recommend)
A soil meter is a probe with a screen on top. You stick it in the ground, wait thirty seconds, and it tells you the pH. No vial. No slurry. No waiting for a strip to develop. No squinting at a color chart in bad lighting.
This is the one I use now and the one I’d buy again if mine broke tomorrow.
Here’s how to use one:
- Loosen the soil where you’re testing — meters need decent soil contact and bone-dry hard-packed dirt won’t give you a good reading. If your soil is dry, water it lightly first and wait an hour.
- Push the probe straight down four to six inches deep. Don’t force it through rocks. If you hit something hard, pull out and try a few inches over.
- Wait the time the meter specifies. Usually thirty seconds to a minute. Don’t pull it out early.
- Read the number. Write it down — you’re going to want a record.
- Test in two or three spots in the same bed, especially if you’re working with a larger area. Soil isn’t uniform. Average your readings.
[IMAGE: digital soil pH meter probe inserted in dark garden soil — “digital soil meter testing blueberry pH”]
Test in the morning if you can, before the day heats up. Take readings twice a year minimum — once in early spring before you do anything, and again in late fall after a season of growing. If you’ve been actively adjusting your pH, test more often than that.
A note on meter quality: the very cheapest meters (the fifteen-dollar ones from the bargain rack) are unreliable. The mid-range ones — twenty five to fifty dollars — are dramatically better and will last you years. The top end ones – a hundred dollars plus are overkill for most us. We’ve picked our favorites below so you’re not staring at a screen comparing three hundred options and hoping for the best.

What Your Number Means (And Why “Off” Isn’t a Disaster)
You ran the test. You have a number. Now what?
Below 4.5: Rare, but possible — usually only happens in heavily forested areas with deep pine litter. If this is you, you may not need to do anything at all. Plant and watch.
4.5 to 5.5: This is the sweet spot. You’re in the room blueberries want to be in. Plant with confidence and re-test next season just to make sure you’re holding steady.
5.5 to 6.5: Mildly too high. Most backyards land here, and the good news is mild adjustment will get you where you need to be over a season or two. Don’t panic. We’ll handle this.
Above 6.5: Too high. You’ll need to commit to a real acidification plan, which we’re going to walk through right now. This is also fixable — it just takes longer than you’d like, and it takes consistency.
The thing I want you to actually hear: a high number doesn’t mean you’ve failed. It means you have information. That’s the whole point of testing — knowing where you stand so you know what to do. Plants don’t grade you. They just respond to what you do over time.
How to Lower Blueberry Soil pH
Lowering soil pH is called acidifying. The goal is to bring your number down into that 4.5 to 5.5 zone and hold it there. The two big things to know before we get into the how:
It is slow. Pull this out of your head right now: there is no product you can buy that will lower your soil pH overnight. Anything that promised that would burn the roots off your plants. The whole point is gradual change.
It is layered. You don’t pick one method and stick with it forever. Most of us end up using a combination — a one-time amendment to start, then ongoing maintenance with mulch and compost choices. We’ll cover both.
Elemental Sulfur — The Workhorse
Elemental sulfur is the most reliable way to lower soil pH for blueberries. You broadcast it on the soil surface, water it in, and then you wait. The reason it works is also the reason it’s slow, which I’m going to let Kevin explain because this is his territory.
Elemental sulfur doesn’t lower pH on its own — it gets converted into sulfuric acid by soil microbes, and that’s what actually drops the pH. The catch is that those microbes are temperature-dependent. Below about 55 degrees Fahrenheit they slow way down. Below 40 they basically stop. So if you put sulfur down in November and check your pH in February, you’re going to be disappointed. Apply in spring or fall when soil temps are warm enough for the microbes to do their job. Most home applications take three to six months to show their full effect, and that’s working as designed. Don’t apply more thinking it’ll go faster — that’s how you over-correct and end up trying to bring the pH back up.
Thank you, my favorite walking textbook. The takeaway: apply sulfur according to the package rate (it varies by your starting pH and your soil type), water it in, and re-test in three months. Then adjust if needed.
Soil Acidifiers — Pre-Mixed and Forgiving
If the idea of figuring out sulfur application rates makes your head hurt, soil acidifier blends are the easier path. They’re pre-mixed products designed specifically for acid-loving plants — blueberries, azaleas, rhododendrons, hollies — and they come with application instructions written for normal humans, not chemists.
These are what I reach for most often. Easier to apply, harder to mess up, and most of them include some slow-release nutrients along with the acidifying ingredients. Two or three applications a year for established beds, more often the first year while you’re getting established.
We’ve picked our favorites below.


What Grandma Did (Before Anyone Said the Word “pH”)
My grandmother came up in pine country in northern Idaho. She never owned a soil meter. She didn’t need one.
Grandpa kept a bushel basket by the back door for the pine needles. Every fall he raked them up and worked them right into the bed where the bushes grew. Coffee grounds went in too — she saved them in a coffee can on the windowsill all week. He said the bushes told him when they were happy. They told him every July when they hung heavy enough to bend a branch.
Pine needles are mildly acidic. So are coffee grounds, oak leaves, and shredded bark mulch. The science says so now. He never asked the science.
These traditional methods absolutely work — they just work slowly, which is exactly why they make such good ongoing maintenance. A two-to-three-inch layer of pine needle mulch around your blueberries each spring contributes acidity gradually as it breaks down. Coffee grounds worked into the top inch of soil twice a year do the same thing. Combine them with a soil acidifier application and you have a maintenance routine that holds your pH steady without you having to think about it much.
How Long Until It Works (And When to Re-Test)
Here is the honest timeline so you don’t lose faith mid-process:
- First application of sulfur or acidifier: Re-test in 8 to 12 weeks. You should see the number start moving down.
- Bringing pH from 7.0 down to 5.0: Plan on 12 to 24 months of consistent work. This is a season-or-two project, not a weekend project.
- Maintenance once you’re in range: Re-test twice a year — early spring and late fall — and apply maintenance acidifier or pine needle mulch as needed.
If your number drops below 4.5, ease off. Soil pH can swing the other direction if you over-apply, and recovering from too-low is a whole separate project. The garden gives you time to course-correct. Use it.
For deeper reading on blueberry soil management, Oregon State Extension’s Growing Blueberries in Your Home Garden publication is one of the best free resources out there. It’s a serious read but the science backs up everything we’ve covered here.
Stay With Us
Two things, then I’ll let you go:
First — if you haven’t grabbed your free growing zone report yet, do it now. Knowing your zone changes which varieties you should be planting in the first place, and there’s no sense fixing your soil for a plant that isn’t right for where you live.
Second — come find us on the newsletter list. I send out garden gossip every week, sometimes more often when something goes sideways and I have to tell somebody. You’ll fit right in.
Now go test your soil.
— Ivy

Disclaimer: This post is for informational purposes only and should not be construed as health, wellness or nutrition advice. Please see our full disclaimers here.
Leave a Reply