Disclosure: This post may contain affiliate links, meaning we get a commission if you decide to make a purchase through our links, at no cost to you. See our full disclosure here.
Alright, dirt divas and dudes, let’s talk seed starting. And let’s be real, shall we? We’ve all had those moments where our precious little seedlings look less like the vibrant veggies of our dreams and more like they’re auditioning for a low-budget horror flick. I once had a tomato seedling so leggy it looked like it was trying to escape the grow light and join the circus. Seriously, it could have juggled cherry tomatoes. It was a sad, spindly sight. But hey, that’s gardening, right? A glorious mix of triumph and “oh crap, what did I do?”
But fear not, my green-thumbed gurus-in-training! Because starting seeds indoors doesn’t have to be a scary movie marathon. It’s actually a fantastic way to get a head start on the growing season, giving you more control over your little plant babies and ultimately, a bigger harvest of deliciousness. Think of it as giving your plants a VIP pass to the good life.
Now, I know what you’re thinking: “Ivy, all those gardening websites make it sound so complicated!” And you’re right. They’re all stuffy and serious and make gardening seem like some kind of scientific equation. But here at DirtDivaDiaries, we believe in growing your own way. No rigid rules, no pressure, just good ol’ fashioned fun with a little dirt under your fingernails.
So, whether you’re a newbie who’s never held a trowel or a seasoned pro looking for a refresher, this guide is for you. We’ll break down everything you need to know about when to start seeds indoors, keeping it simple, sassy, and, most importantly, successful. Because at DirtDivaDiaries, we’re all about empowering you to create the garden of your dreams, one sassy seedling at a time.
Alright, let’s get down to the nitty-gritty, shall we? Starting seeds indoors. Instead of tossing seeds directly into the unpredictable wilds of your backyard, you’re creating a controlled environment, a botanical birthing suite, if you will.
Why bother, you ask? Well, for starters, it extends your growing season. Think about it: if you live in a place where winter hangs around like an unwanted houseguest, starting seeds indoors allows you to get a jump on things. You can nurture those tiny sprouts while Jack Frost is still nipping at your nose, and then, when the weather’s playing nice, transplant them outside, ready to rock and roll.
Beyond that, indoor seed starting gives you control. You’re the boss of this operation. You decide the temperature, the humidity, the lighting–everything those little green beans need to thrive. No more praying to the weather gods or crossing your fingers that some random critter doesn’t munch on your precious seedlings. It’s like having your own personal plant nursery, and who wouldn’t want that?
Plus, let’s be honest, it’s just plain fun. There’s something incredibly satisfying about watching a tiny seed transform into a vibrant seedling, knowing you had a hand in it. It’s like being a plant parent, only they don’t talk back (most of the time). So, if you’re ready to take your gardening game to the next level, starting seeds indoors is the way to go. Trust me, your taste buds (and your garden) will thank you.
Now, before we dive headfirst into the world of seed starting, let’s talk about rules. Or rather, the distinct lack thereof. Look, gardening isn’t about rigid regulations and stuffy procedures. It’s about connecting with nature, getting your hands dirty, and, most importantly, having fun! So, while I’ll give you some guidelines (because, let’s face it, even sassy gardeners need a little structure), remember that the “grow your own way” philosophy reigns supreme here at DirtDivaDiaries. Think of these tips as friendly suggestions, not commandments carved in stone. Feel free to experiment, bend the rules, and discover what works best for you and your garden. After all, that’s what gardening is all about!
And speaking of “grow your own way,” these tips are for everyone. Whether you’re brand new and never even seen a seed up close or a seasoned dirt diva or dude with a garden full of bragging rights, you’ll find something useful here. We’re all in this together, learning, growing, and occasionally laughing at our own gardening mishaps (because they happen, trust me!). So, grab your favorite beverage, put on your gardening gloves (or don’t, if you’re into that whole “au naturel” thing), and let’s get our hands dirty! Welcome to the DirtDivaDiaries family, where we celebrate individuality, creativity, and the joy of growing your own way.
Section 1: Understanding Your Growing Zone (Because Geography Matters, Darlings)
Alright, let’s talk about growing zones. Because, darling, geography matters. You can’t just plant a palm tree in Alaska and expect it to thrive (unless you’ve got a seriously impressive greenhouse and a whole lot of patience). Think of growing zones as a cheat sheet, a cosmic roadmap that tells you what plants are likely to survive and thrive in your particular neck of the woods. It’s all based on average frost dates and temperatures, which, let’s be honest, can be unpredictable these days. But hey, even Mother Nature has her moods.
So, what exactly is a growing zone? It’s a numbered zone that corresponds to a range of average minimum winter temperatures. The lower the number, the colder the winter. Here in the US, we use the USDA Plant Hardiness Zone Map. You can find your zone by simply Googling “USDA Plant Hardiness Zone Map” and entering your zip code. It’s like magic, but with science! However, if you sign up for the DirtDivaDiaries Newsletter, we will send you a custom report for your area. This report will provide your growing zone, your average first and last frost dates, and some specific growing tips. This information is invaluable not just in timing when to start your seeds indoors, but also for gardening and landscaping in general.

Now, why is this important for seed starting? Well, knowing your growing zone helps you figure out when it’s safe to start seeds and when you can transplant them outside without risking a frosty surprise. It’s all about timing. You don’t want to start your tomatoes too early, only to have them freeze their little green butts off. And starting them late can make you miss out on precious growing time.
But here’s the sassy secret: growing zones are a guideline, not a gospel. They’re based on averages, and we all know that weather can be a fickle beast. Microclimates (those little pockets of slightly different conditions within a zone) can also play a role. So, while your growing zone is a good starting point, you can experiment and push the boundaries a little. After all, “grow your own way” applies to growing zones too! Flexibility is key, my friends. Just keep an eye on the weather forecast and be prepared to protect your precious seedlings if a late frost threatens. Because even the sassiest gardener has to play it safe sometimes.
Section 2: The Seed Starting Timeline (A Flexible Framework)
Alright, let’s talk timelines. Because when starting seeds, timing is everything. But don’t worry, we’re not talking about some rigid, unshakeable schedule. This is a flexible framework, a gentle nudge in the right direction. It’s more of a gardening GPS, not a drill sergeant.
Your gardening zone, which we talked about a few paragraphs ago, will give you your last frost date. You can start working backward from that date to figure out when to start seeds indoors. Here’s a general guideline for some popular plants:
- Tomatoes, Peppers, Eggplants: 8-10 weeks before last frost
- Broccoli, Cauliflower, Cabbage: 6-8 weeks before last frost
- Lettuce, Spinach: 4-6 weeks before last frost
- Herbs (like basil, parsley): 4-6 weeks before last frost
But remember, my sassy sprouts, these are guidelines. Variations exist for different plants, different varieties, and even different microclimates within your own garden. Some plants might prefer a head start, while others are perfectly happy to be sown directly into the ground. It’s all about getting to know your plants and experimenting a little. Just monitor those weather forecasts, and be prepared to adjust your plans if Mother Nature throws you a curveball. Because she will.
Section 3: Popular Veggies, Fruits, and Herbs: When to Start Seeds Indoors (The Fun Part!)
Let’s get to the fun part! We’re about to dive headfirst into seed starting, where you get to play Mother Nature (but with better shoes 😉). But remember, just like a fabulous pair of stilettos, timing is everything!
Here’s a sneak peek at some popular plants and when to start seeds indoors:
Veggies:
- Tomatoes: 8-10 weeks before your last frost
- Peppers: 8-10 weeks before your last frost
- Eggplants: 8-10 weeks before your last frost
- Broccoli: 6-8 weeks before your last frost
- Cauliflower: 6-8 weeks before your last frost
- Cabbage: 6-8 weeks before your last frost
- Lettuce: 4-6 weeks before your last frost
- Spinach: 4-6 weeks before your last frost
Herbs:
- Basil: 4-6 weeks before your last frost
- Parsley: 4-6 weeks before your last frost
Fruits:
- Strawberries: 6-8 weeks before your last frost
- Melons: 4-6 weeks before your last frost
Ivy’s Sassy Seed-Starting Tips:
- Tomatoes? Start ’em early, they’re drama queens! They need plenty of time to develop their fabulous foliage and prepare for their starring role in your summer salads.
- Peppers? Patience, darling! These divas take their time to germinate, so don’t get discouraged if they don’t pop up right away.
- Herbs? Easy peasy, lemon squeezy! Most herbs are pretty low-maintenance and don’t need a long head start indoors.
- Eggplants? These drama mamas need warmth, so make sure they’re nice and cozy indoors before you even think about transplanting them outside.
- Broccoli, Cauliflower, and Cabbage? These cool cats can handle a little chill, so you don’t have to pamper them as much as some of the other divas.
- Lettuce and Spinach? These fast-growing greens are perfect for impatient gardeners! You’ll be harvesting them in no time.
- Strawberries? Start these sweethearts early, and you’ll be rewarded with juicy berries all summer long.
- Melons? These sun-worshippers need plenty of warmth and light, so give them a prime spot on your windowsill.
Keep in mind, these are just guidelines, my dears! Experiment to find what suits your gardening style best. Essentially, that’s the core meaning of “grow your own way”!
Don’t be afraid to try starting your seeds a little earlier or later, depending on your specific climate and the type of plant you’re growing. And most importantly, have fun with it! Seed starting should be a joyous journey of discovery, not a stressful science experiment. So, relax, put on your favorite gardening playlist, and let those seeds sprout their way to success!
Section 4: Seed Starting Essentials (Your Arsenal of Awesome)
So, now that we’ve got the when down, let’s talk about the what. Every gardener needs the right tools for the job. Don’t worry, no fancy gadgets or expensive equipment. Just the basics, but with a touch of Ivy’s signature sass, of course.
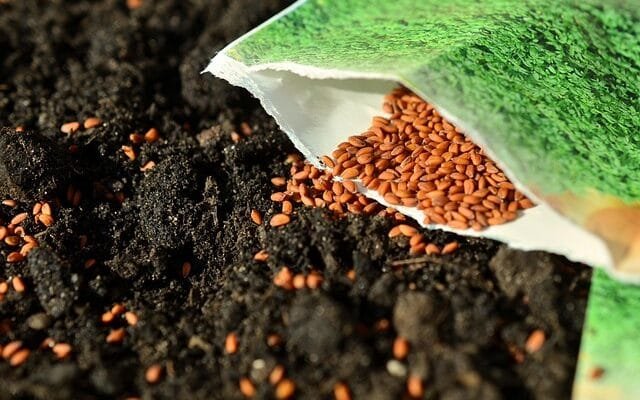
Seed Starting Mix:
First things first, ditch that heavy garden soil, honey! Your delicate seedlings need something lighter and fluffier to get their roots going. Look for a seedling mix, which is specially formulated to be loose, airy, and packed with nutrients. It’s like a spa day for your seeds, giving them the perfect environment to germinate and grow. We have tried many of the seed starting mixes out there, so check out our page on seed starting mix.
Containers:
Next up, let’s talk about where these little sprouts are going to call home. You can use anything from recycled yogurt cups to fancy seed trays, as long as it has good drainage. Remember, soggy bottoms are a big no-no in the seed starting world! It’s like wearing wet socks all day. Nobody wants that. So, make sure your containers have holes in the bottom to let excess water escape. And don’t forget to label them, unless you want to play a guessing game later on.
The easiest solution is a seed starting tray. Check out our favorites here. Our favorite comes in multipack for usually just under $20. The pack will let you start 60 plants at a time, and since it is a multipack, it is super easy to have different starting dates for different plants.
Light:
Now, let’s shed some light on the situation, shall we? Seedlings are like little sunbathers. They crave those bright rays. If you’ve got a sunny windowsill, that might be enough to get them started. But if you’re serious about seed starting, you might want to invest in a grow light. They aren’t very expensive and can make a world of difference. It’s like giving your seedlings their own personal tanning bed, but without the harmful UV rays. Plus, it’ll keep them from getting leggy and reaching for the sky like they’re trying to audition for the Rockettes.
If you are using a window, you need to make sure you regularly rotate your seed trays for even light. Otherwise, your plants will grow leaning toward the light source and may get quite leggy.
Watering:
Last but not least, let’s talk about hydration. Seedlings are like divas. They need their water, but not too much. You want to keep the soil moist but not soggy. A good rule of thumb is to water when the top inch of soil feels dry to the touch. And when you do water, do it gently, like you’re serenading your seedlings with a love song. No need to blast them with a firehose!
Our favorite seed starting tray is actually a self-watering one. This helps maintain a consistent level of moisture, and since it waters from below, you never have to disturb your tiny seedlings with a shower. Check it out here.
And there you have it, my dears! Your arsenal of awesome for seed starting success. With these simple essentials, you’ll be well on your way to growing a garden that’s the envy of the neighborhood.
Section 5: Troubleshooting Seed Starting Problems (Because Things Happen)
Okay, my little sprouts, let’s have a real heart-to-heart about those moments when things don’t go exactly as planned. Even the most experienced gardener has had their fair share of seed-starting snafus, no matter how carefully they plan out when to start seeds indoors. But before you grab the gardening gloves and throw in the trowel, remember–it’s all part of the journey!
Leggy Seedlings:
Uh oh, your seedlings are starting to look a little… stretched. You would think they’re entering a giraffe fashion show. Don’t worry, darling, it happens to the best of us. Leggy seedlings are usually a sign that they’re not getting enough light. So, give those babies a little more sunshine or get yourself a grow light.
Damping Off:
This sounds like a bad hair day, but it’s actually a fungal disease that can cause your seedlings to wilt and die. It’s usually caused by over-watering or poor air circulation. So, ease up on the watering can and make sure those seedlings have plenty of space to breathe. And if you do spot some damping off, don’t panic! Just remove the affected seedlings and try again.
Poor Germination:
Hmm, your seeds are being a bit shy, aren’t they? Not to worry, there are a few things you can try. First, make sure your seeds are fresh and viable. Sometimes, those old seeds just don’t have the energy to sprout. You can also try soaking your seeds in water for a couple of hours before planting to give them a little boost. And if all else fails, don’t be afraid to start over with a new batch of seeds. Of course, make sure you just aren’t being impatient. My first time starting seeds, I checked on them the very next morning and was disappointed I didn’t have plants yet. Some seeds will sprout within a few days, and others may take two weeks, so don’t panic. I usually allow one week past the expected time frame before I replant. Sometimes, five out of six seeds will pop up, and the last will wait a week. So, patience here is not a bad thing.
Remember:
Seed starting can be a bit of a rollercoaster, with its trials and unexpected twists and turns. But that’s all part of the fun! Don’t let a few setbacks discourage you. Take a deep breath, assess the situation, and try again. Gardening is a process rather than a competition. So relax, have fun, and enjoy the process. Essentially, that’s what “grow your own way” means!
Section 6: Transplanting Seedlings Outdoors (The Big Move!)
Okay, you’ve nurtured your seedlings, watched them grow strong, and now they’re ready for their grand debut in the real world. It’s time for the big move—transplantation day! But hold your horses, darling, we can’t just toss these pampered babies into the wild without a little preparation.
Hardening Off:
Think of hardening off as a boot camp for your seedlings, a gentle introduction to the harsh realities of the great outdoors. It’s like giving them a taste of the real world before they’re fully exposed. Basically, you’re gradually acclimating them to the sun, wind, and fluctuating temperatures. Start by taking your seedlings outside for a few hours each day, gradually increasing their exposure over a week or two. We have a comprehensive guide to Hardening Off Seedlings, so check it out.
Transplanting Tips:
Now, for the main event—planting those babies in the ground! Choose a nice sunny spot, dig a hole slightly larger than the seedling’s container, and gently place it in the hole. Make sure the top of the root ball is level with the soil surface. Pat the soil around the seedling, water it well, and voila! You’ve officially transplanted a seedling. Congratulations, you’re practically a pro!
Celebrate Your Success!
Take a moment to admire your handiwork, my dears. You’ve taken a tiny seed and nurtured it into a thriving plant. That’s something to celebrate and brag about on your favorite social media! Pat yourself on the back, do a little dance, and maybe even treat yourself to a celebratory cocktail. You deserve it, darling! And if you do post on social, don’t forget to tag us with #dirtdivadiaries.
Remember, gardening is a journey, not a destination. There will be difficulties, successes, and failures. But the most important thing is to have fun and grow your own way. So, go forth, my little seedlings, and create a garden that’s as unique and fabulous as you are!

Conclusion: You Grew Your Own Way, Diva!
Well, you’ve reached the end of our seed-starting saga. I hope you’re feeling empowered, inspired, and ready to get your hands dirty! Remember, seed starting is an ongoing process, not a one-time event. There will be triumphs and tribulations, successes and setbacks. But through it all, remember to have fun and stay true to yourself. After all, that’s what we mean when we say “grow your own way!
Experiment, break the rules, and dance to the beat of your own gardening drum. Try different techniques, play with different varieties, and find your favorites for your unique garden. And most importantly, don’t forget to share your seed-starting stories and photos with the Dirt Diva Diaries community! We’re a community learning, growing, and celebrating the joy of gardening. So, let’s see those seedlings sprout, divas and dudes!
Don’t forget to join our newsletter so you can get that personal zone chart and of course an extra dose of sass straight to your inbox.
Disclaimer: This post is for informational purposes only and should not be construed as health, wellness or nutrition advice. Please see our full disclaimers here.
Leave a Reply