Disclosure: This post may contain affiliate links, meaning we get a commission if you decide to make a purchase through our links, at no cost to you. See our full disclosure here.
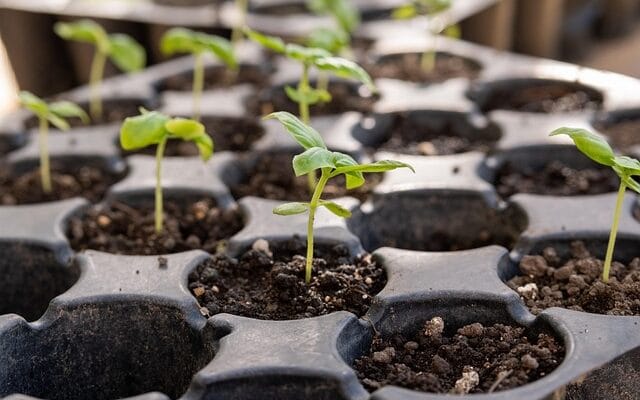
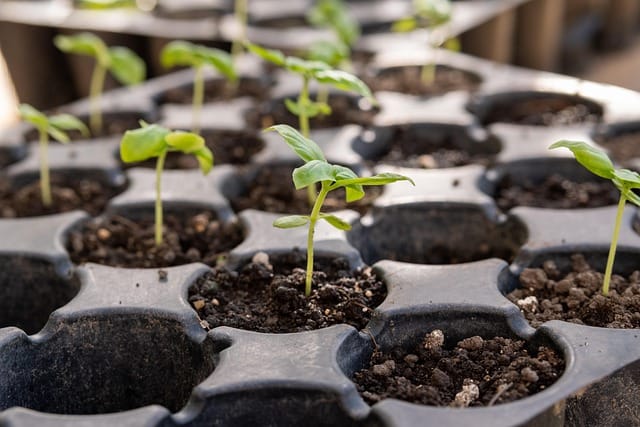
Alright, new gardeners, gather ’round! Today, we’re diving into a topic that’s absolutely crucial for your seedlings to thrive in the great outdoors: hardening off. Now, I know what you might think—”Hardening off? Sounds intense!” But trust me, it’s not as tough as it sounds. It’s like a gentle introduction to the real world for your pampered seedlings.

Think of it this way: your seedlings have been living the good life indoors, with cozy temperatures, plenty of water, and protection from the elements. But just like a kid who’s never left the house, they need to toughen up a bit before they can face the outside world. That’s where hardening off comes in.
Now, I’ve learned the importance of hardening off seedlings the hard way. Back when I first started gardening, I was so eager to get my seedlings in the ground that I skipped this crucial step. I figured, “Hey, they’re plants, they’ll be fine!” Well, let me tell you, I was wrong. The poor things wilted faster than lettuce in the Sahara Desert. It was a massacre of epic proportions, and I vowed never to make that mistake again.
So, what exactly is hardening off? In a nutshell, it’s the process of gradually acclimating your seedlings to the harsher conditions of the outdoors—the wind, the sun, the fluctuating temperatures. It’s like teaching them survival basics before they encounter the wild.
By hardening off your seedlings, you’re helping them build resilience and strength, so they can withstand the challenges that come with outdoor living. It’s like giving them a suit of armor and a pep talk all rolled into one. And trust me, the payoff is huge. Hardened-off seedlings are less likely to suffer from transplant shock, they’ll grow stronger and healthier, and they’ll be better equipped to fight off diseases and pests.
So, if you want to give your seedlings the best chance of success in the garden, don’t skip the hardening off process. It’s a simple but crucial step that can make all the difference. And who knows, you might even enjoy watching your seedlings transform from delicate babies into tough little warriors!
When to Start Hardening Off Seedlings
Now that you have a good understanding of what hardening off is and why it’s important, let’s talk about when to start the process. Timing is key here, as starting too early or too late can be detrimental to your seedlings’ health and success in the garden.
So, when is the best time to start hardening off seedlings? Generally, you should begin the process about 7-14 days before you plan to transplant your seedlings into the garden. This timeframe allows for a gradual acclimatization to the outdoors, without shocking the seedlings or delaying their growth.
However, the exact timing varies based on several factors, including the seedling type, the weather, and your gardening preferences. Let’s break down each factor in more detail:
Seedling Type
Different seedlings have different tolerances to the elements. Peppers and tomatoes, are quite sensitive to cold and wind, while others, like kale and cabbage, are more resilient. As a general rule, you can start hardening off more cold-tolerant seedlings a bit earlier, while more tender seedlings should be hardened off nearer to the transplanting date.
Weather Conditions
Weather plays a crucial role in the hardening off process. If you start hardening off during extreme cold or hot weather, your seedlings are more likely to experience stress or damage. Ideally, you begin when the weather is mild and stable, with no extreme temperature fluctuations or harsh winds. Monitor the weather forecast and change your hardening off schedule accordingly.
Personal Preferences
Gardening is unique for everyone; no single method fits all for hardening off. Some gardeners prefer to start the process earlier, while others wait until closer to the transplanting date. Ultimately, deciding when to start hardening off is up to you, based on your experience, comfort level, and specific gardening goals.
Additional Tips for Timing
- Seedling Age: Consider the age of your seedlings before starting the hardening-off process. Seedlings that are too young may not be strong enough to handle the stress of outdoor conditions, while seedlings that are too old may have already become accustomed to the indoor environment and be more prone to transplant shock. Ideally, start hardening off seedlings that are about 4-6 weeks old, with a healthy root system and several sets of true leaves.
- Plant Type: different plants have different hardening-off requirements. Some plants, like tomatoes and peppers, need a longer hardening-off period, while others, like lettuce and spinach, can be hardened off more quickly. Consult gardening resources or seed packets for specific recommendations for different plant types.
- Weather Forecasts: Keep a close eye on weather forecasts before and while you are hardening-off. Adjust your hardening off schedule if you expect extreme temperatures or harsh weather conditions. You can use a calendar or gardening app to track the hardening-off period and make any necessary adjustments.
Hardening off is gradual, so don’t rush it. Start with short periods of outdoor exposure and gradually increase the time as your seedlings acclimate. Monitor your seedlings closely for signs of stress, such as wilting, discoloration, or stunted growth, and adjust the hardening process accordingly. And most importantly, enjoy the journey! Watching your seedlings grow into mini superheroes is a rewarding experience that will prepare them for a successful season your garden.
The Hardening Off Process: A Step-by-Step Guide
Alright, let’s get down to the nitty-gritty of hardening off those seedlings and preparing them for their grand debut in the garden. The hardening-off process is all about gradually exposing your seedlings to the variable weather so they can adjust to the new environment without experiencing shock or stress. It’s a gentle way to introduce them to the real world gradually.
The exact hardening-off process can vary depending on several factors, such as the type of seedling, the weather conditions, and your gardening style. But here’s a general step-by-step guide to get you started:
Step 1: Introduce to Shade
Begin putting your seedlings in a shaded area outdoors for a few hours each day. A porch, a shaded balcony, or under a tree are good options. This initial exposure allows seedlings to adapt to changes in their environment without direct sunlight.
Step 2: Increase Sun Exposure
After a few days of shade, gradually increase your seedlings’ exposure to sunlight. Start with an hour or two of morning sun and gradually increase the duration and intensity over several days. Monitor your plants for any signs of stress, including wilting or discoloration, and adjust their exposure as needed.
Step 3: Introduce to Wind
Wind can be a challenge for young seedlings, so it’s important to introduce them to it gradually. Start by placing your seedlings in a sheltered location with gentle breezes and gradually increase their exposure to stronger winds over several days. You can use a windbreak, such as a fence or a row of shrubs, to guard your seedlings from winds.
Step 4: Introduce to Nighttime Temperatures
Nighttime temperatures can fluctuate significantly, so you must gradually acclimate your seedlings to them. Start by bringing your seedlings indoors at night, and gradually expose them to longer periods of nighttime temperatures over several days. In case of a cold night, cover seedlings or move them indoors to prevent frost damage.
Step 5: Monitor and Adjust
During hardening off, closely watch seedlings for stress or damage. Modify the exposure as necessary if there are signs of wilting, discoloration, or stunted growth. Remember, hardening off is a journey. It’s better to err on the side of caution and gradually increase exposure than to shock your seedlings and set them back.
Additional Tips for Hardening Off
- Watering: Keep your seedlings well-watered while hardening off, as they will dry out more quickly in the outdoor environment. Water early or in the evening, to avoid the hottest part of the day.
- Fertilizing: Avoid fertilizing your seedlings during the hardening off process, as this can encourage excessive growth and make them more prone to stress.
- Hardening Off Time: This process usually takes 7-14 days, but it can vary by seedling type, weather, and preferences.
- Seedling Location: Choose a location protected from extreme temperatures, harsh winds, and pests for hardening off.
- Seedling Protection: If you anticipate harsh weather conditions, such as a cold snap or a heat wave, shelter your seedlings for protection.
Remember, hardening off is crucial in preparing your seedlings for a successful transition into the garden. By gradually exposing them to the elements, you give them the tools they need to thrive outdoors. And with a little patience and observation, you’ll have healthy, resilient plants that are able to produce a bountiful harvest.
Tips and Tricks for Success
Now, let’s dive into some extra tips and tricks to make your hardening-off process successful. These are the insider secrets, the little nuggets of wisdom that I’ve gathered over years of gardening experience, and I’m excited to share them with you.
Tip 1: Embrace the Cold Frame
A cold frame is a miniature greenhouse, a cozy little haven for your seedlings to transition into the outdoor environment. It’s like a transition space for plants, allowing them to adjust to light, temperature, and air circulation without full garden exposure. You can buy a cold frame or build your own using scrap wood and old windows. Initially, position your seedlings within the cold frame for several hours daily, gradually extending the duration as they adjust to the environment.
Tip 2: Water Wisely
Seedlings are thirsty little creatures, especially when they’re exposed to the outdoor elements. Ensure they are adequately watered during the hardening off process, but be cautious not to over-water, as this can result in root rot and other complications. Watering in the morning avoids the afternoon heat and allows the plant to dry before cooler night temperatures.
Tip 3: Monitor for Stress
Seedlings are sensitive souls, and they’ll let you know if they’re feeling stressed or overwhelmed. Watch for discoloration, wilting, or stunted growth. If you notice any of these symptoms, make adjustments to the hardening off process. Reduce exposure time, add shade, or water more frequently.
Tip 4: Gradual is the Name of the Game
Hardening off is a marathon, not a sprint. Don’t rush the process or try to expose your seedlings to the elements too quickly. A gradual approach is key to success, allowing the seedlings to adjust at their own pace. Begin with brief outdoor sessions and gradually extend the duration as they acclimate.
Tip 5: Location, Location, Location
Choosing the right location for hardening off is crucial. Choose a location that is shielded from extreme temperatures, strong winds, and pests. Suitable options include a shaded porch, a balcony, or beneath a tree. Avoid placing your seedlings in direct sunlight or in areas where they might be exposed to strong winds or pests.
Tip 6: Pests and Diseases
Hardening off can make your seedlings more vulnerable during the process, so it’s important to be vigilant. Check your seedlings regularly for signs of infestation or infection. If you notice any problems, take action immediately. You can use organic or chemical pest control methods, depending on your preferences and the severity of the infestation.
Tip 7: Embrace the Row Cover
Row covers are like a warm blanket for your seedlings, providing protection from the elements and pests. They’re especially useful for hardening off more sensitive seedlings, such as tomatoes and peppers. You can buy row covers or make your own using lightweight fabric. Place the row cover over your seedlings, securing the edges to prevent wind damage.
Tip 8: Don’t Neglect the Roots
Hardening off focuses on acclimating the above-ground parts, but don’t neglect the roots. Healthy roots are essential for strong, resilient plants. Keep the soil moist but not waterlogged, and avoid over-fertilizing, which can damage the roots.
Tip 9: Embrace the Experiment
Gardening is a learning process; hardening off is a process that varies in different situations. Don’t hesitate to experiment and try different techniques to see what works best for your seedlings and your specific growing conditions. Keep notes on your successes and failures, and use them to refine your hardening off process.
Tip 10: Enjoy the Journey
Hardening off is a rewarding experience, a chance to connect with your seedlings and watch them grow stronger and more resilient. Take the time to observe them, appreciate their progress, and celebrate their successes. Gardening is a journey, not a destination, and hardening off is a beautiful part of that journey.
By following these tips and tricks, you’ll be well on your way to hardening off successfully. And with time, inspecting, and a smile, you’ll be rewarded with healthy, thriving plants that are ready to take on the garden challenges. So, go forth and harden off those seedlings, and let the gardening adventures begin!

Hardening Off Different Seedlings
Now that you’re an expert on hardening off, let’s explore the fascinating world of different varieties and their needs during this crucial transition period. Like people, seedlings have diverse personalities and preferences, so treating them as individuals is important, not just as a homogenous green blob.
Seedlings can be a bit like drama queens (or kings!), throwing tantrums and staging protests if they don’t get their way. Some seedlings are more sensitive to cold, wilting like delicate snowflakes at the mere mention of a chilly breeze. Others are sun-worshippers, basking in the glory of direct sunlight, while some prefer a more sheltered existence, thriving in the gentle shade.
Understanding these individual quirks and preferences is key to successful hardening off. Comparable to being a therapist for your seedlings, listening to their silent cries and responding with the appropriate care and attention. Seedlings like tomatoes and peppers, are notorious for their diva-like behavior, demanding a longer hardening-off period with gradual exposure to the elements. They’re like the prima donnas of the plant world, requiring a slow and steady adjustment period.
Other seedlings, like lettuce and spinach, are more laid-back, adapting quickly to the outdoor environment. They’re like the easy-going folks in the plant community, ready to embrace the challenges with open arms.
You may be thinking, “How do I know which seedling is which? Do I need a PhD in plant psychology?” Fear not, my fellow gardeners, for there are plenty of resources to guide you through this seedling maze. Seed packets, gardening literature, and DirtDivaDiaries provide extensive information regarding various seedling varieties and their specific requirements during the hardening-off process.
It’s like having a cheat sheet for your seedlings, a guide to their individual personalities and preferences. Some seedlings, like those in the cabbage family, are known for their resilience, tolerating a bit of roughhousing during hardening off. They’re resilient, ready to handle garden challenges with ease.
Others, like those in the squash family, are more sensitive, requiring a gentler approach. They’re like the sensitive souls in the plant community, needing a bit of extra TLC during their transition to the outdoors.
By understanding these individual needs and preferences, you can tailor your hardening off process to each seedling variety, ensuring a smooth and successful transition to the garden. It’s like being a matchmaker for your seedlings, finding the perfect outdoor environment for each one to thrive and flourish.
So, embrace the diversity of your seedlings, and treat them as individuals. With a little observation, patience, and a few laughs, you’ll be able to harden off your seedlings like a pro, preparing them for a successful and productive life in the garden.
Organic vs. Chemical Gardening: Hardening Off Considerations
Now, let’s dive into the hardening off and explore the differences between organic and chemical gardening in relation to this process. While the fundamental principles of hardening off remain the same, there are some specific considerations and nuances depending on your chosen gardening path.
Organic gardening, as the name suggests, is all about embracing the natural world and minimizing the use of synthetic chemicals. As if you were a plant whisperer, nurturing seedlings with Mother Nature’s care. Organic gardeners often use natural fertilizers, such as compost or manure, and rely on beneficial insects and other natural control methods.
Chemical gardening takes a more proactive approach, using synthetic fertilizers, pesticides, and other chemicals to boost growth and protect plants. It’s like being a plant doctor, providing your seedlings with the medicine and treatments to ensure their health and vitality. Chemical gardeners often use synthetic fertilizers like Miracle-Gro and rely on pesticides and other chemicals to deal with problems.
Now, how do these differences play out in the hardening off process? Well, they shouldn’t. The process is designed to protect your plants and encourage good adaptability. Organic and chemical gardeners both need to follow the same considerations to acclimate their seedlings.
Ultimately, choosing between organic and chemical should be based on your values, preferences, and gardening goals. There’s no right or wrong answer, and both approaches can lead to successful hardening off and healthy, productive plants.
Here’s a breakdown of some key considerations for each approach:
Organic Gardening
- Natural Fertilizers: Use compost or manure to nourish your seedlings during hardening off.
- Beneficial Insects: Encourage beneficial insects, such as ladybugs and lacewings.
- Natural Barriers: Use row covers or other natural barriers to guard your seedlings from harsh sun and wind.
- Gradual Acclimatization: Take a gradual approach to hardening off, allowing your seedlings to acclimate to the outdoor environment at their own pace.
Chemical Gardening
- Synthetic Fertilizers: Use synthetic fertilizers, such as Miracle-Gro, to boost growth during hardening off.
- Pesticides: Use pesticides to save your seedlings from pests.
- Artificial Barriers: Use shade cloth or other artificial barriers to shield your delicate plants from the elements.
- Proactive Approach: Take a more proactive approach to hardening off, using chemicals and other methods to ensure the health and vitality of your seedlings.
The basic principles of hardening off are consistent regardless of the gardening approach chosen. It’s all about acclimating your seedlings gradually to the outdoor environment, so they can transition smoothly and thrive in the garden. So, choose the approach that resonates with you, and let your gardening journey begin!
Troubleshooting Common Hardening Off Problems
Troubleshooting is essential for any gardener, and hardening off is no exception. It’s important to inspect your seedlings for any signs of distress or discomfort. Seedlings, just like people, can be dramatic, throwing tantrums and expressing their displeasure in various ways. Some might wilt like a deflated balloon, while others might develop mysterious spots or turn a sickly shade of yellow.
These symptoms are like a cry for help, a signal that something is amiss in the hardening off process. As a plant detective, it’s your job to decipher these clues and take action to remedy the situation. Here are some common problems you might encounter during hardening off and how to troubleshoot them:
Problem 1: Seedlings are Wilting
Wilting is a classic sign of stress in seedlings, like a plant version of a fainting spell. It can be caused by several factors, including:
- Overexposure to Sun: If your seedlings are wilting after being exposed to direct sunlight, they might be sunburned. Reduce their exposure time, provide more shade, or increase watering to cool them down.
- Under-watering: Seedlings dry out quickly outdoors, especially on warm or windy days. Maintain soil moisture without causing waterlogging, and water the plants either in the morning or evening to avoid the heat of the day.
- Over-watering: Too much water can suffocate the roots and lead to wilting. Make sure the soil is well-draining and avoid over-watering.
- Temperature Stress: Extreme hot and cold temperatures can cause wilting. If you expect bad weather, protect your seedlings with a blanket or bring them indoors.
Problem 2: Seedlings are Discolored
Discoloration, such as yellowing or browning, can indicate nutrient deficiency, disease, or pest infestation. Here’s how to troubleshoot:
- Nutrient Deficiency: When seedlings are yellowing, they might lack in nitrogen or other essential nutrients. Apply a well-rounded fertilizer to supply them with the nutrients.
- Disease: If your seedlings are developing spots or other discoloration, they might be infected with a disease. Consult a gardening expert or use a disease identification guide to diagnose the problem and take action.
- Pest Infestation: If pests eat or damage your seedlings, they might be discolored or have small holes in the leaves. Check for signs of infestation and take action to control the pests.
Problem 3: Seedlings are Stunted
Stunted growth can be a sign of various problems, including:
- Transplant Shock: If your seedlings were not properly hardened off, they might experience transplant shock, which can stunt their growth. Harden them off gradually and provide care during the transition.
- Nutrient Deficiency: If your seedlings are lacking in essential nutrients, they might be stunted. Use a balanced fertilizer to provide them with the essential nutrients.
- Root Damage: If the roots are damaged during transplanting or because of over-watering, the seedlings might be stunted. Handle the seedlings carefully during transplanting and avoid over-watering.
By inspecting your seedlings and troubleshooting any problems, you can ensure a successful hardening off process and healthy, thriving plants. Remember, gardening is all about learning, and there will be challenges along the way. But with a bit of patience, observation, and a touch of humor, you’ll be able to overcome these challenges and enjoy the rewards of a bountiful garden.
Conclusion
As we reach the end of our hardening off journey, it’s time to reflect on the importance of this simple yet crucial process for successful gardening. Hardening off is like giving your seedlings a pep talk, a final boost of confidence before they face the challenges of the garden. It’s a process that transforms them from delicate indoor babies into resilient plants, ready for the world (or at least your backyard).
The benefits of hardening off are numerous. Hardened-off seedlings are more resilient to transplant shock, grow healthier, and better resist pests and diseases. It’s like a head start in the garden, so they can focus on growing and producing instead of just trying to survive.
For new gardeners, hardening off might seem a bit intimidating at first, but it’s a worthwhile process. It’s an opportunity to monitor the seedlings, observe their growth, and understand their specific needs and preferences. And with a little practice and observation, you’ll become a hardening off pro in no time.
So, embrace the learning process, and don’t be afraid to experiment. Try different techniques, observe your seedlings closely, and adjust the hardening off process accordingly. Every seedling is unique, and there’s no one-size-fits-all approach to hardening off.
Together, let’s make your gardening journey a fulfilling and productive one. Happy gardening!
Disclaimer: This post is for informational purposes only and should not be construed as health, wellness or nutrition advice. Please see our full disclaimers here.
Leave a Reply